How to Install OpenCV & Python 3 on Ubuntu using pip
Python course with 57 real-time projects - Learn Python
How to Install OpenCV – Step-by-Step Guide
Today’s goal will be setting up the environment so that we can finally get into the programming. This tutorial will guide you with a step-by-step process for the easy installation of OpenCV Python.
There are two major versions of Python, Python2, and Python3. We will be covering the latest version of Python throughout the tutorials as it supports newer features.
The OpenCV doesn’t care much about the version of Python, the bindings will work just the same.
Steps to Install OpenCV on Ubuntu
- Install Python on your system
- Install pip
- Install OpenCV library using pip
1. Install Python
Open the terminal in your ubuntu system. The following command will download the Python directly onto your machine.
sudo apt-get install python3

WAIT! Did you check the Latest Features of OpenCV?
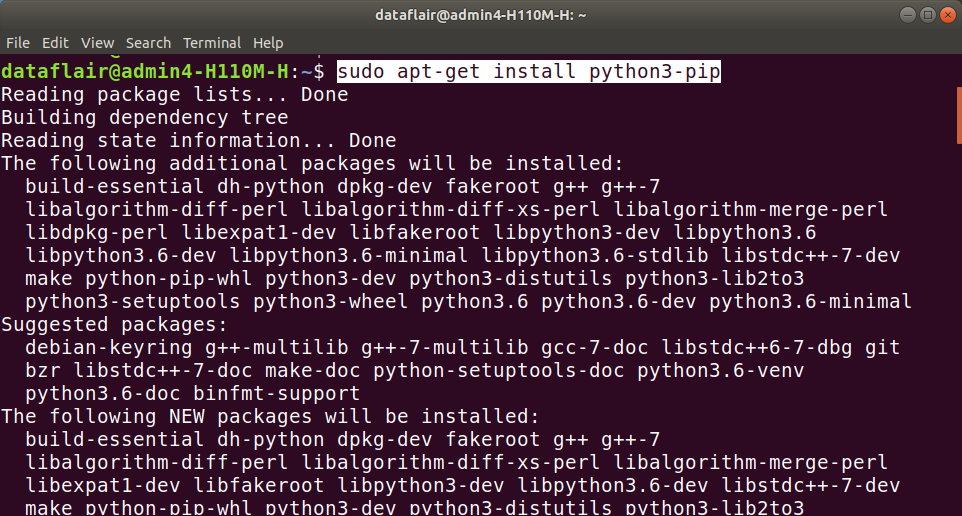
2. Install pip
Pip is the package installer for Python. With pip, we can easily manage the installation of Python packages. To install pip in your ubuntu system, simply run this command on the terminal.
sudo apt-get install python3-pip
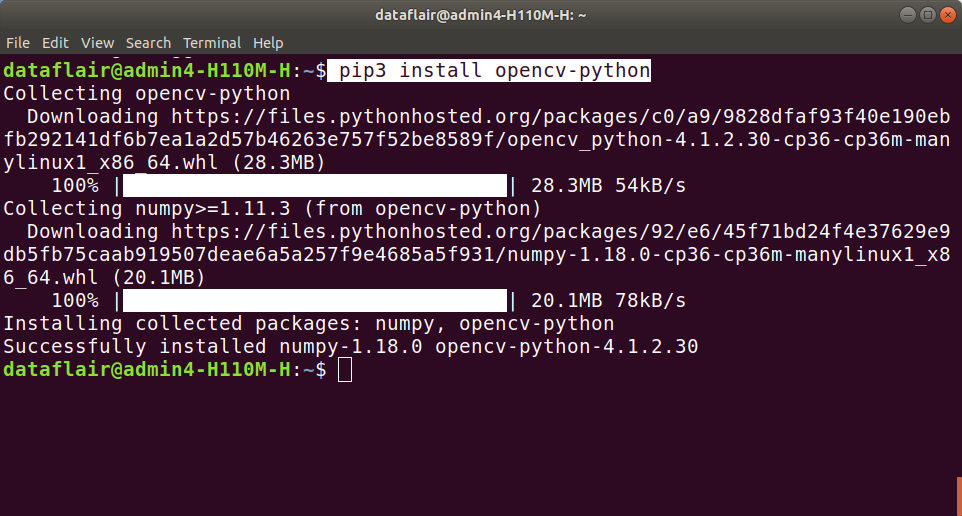
3. Install OpenCV library with pip
After the installation of the Python and pip, we can directly install the OpenCV library and start using them. To install the library, we need to enter the given command in the terminal.
pip3 install opencv-python
This is all you need to do. Now you are ready to start building amazing projects.
Work on the Python Project of Gender & Age Detection using OpenCV
How to Verify the OpenCV Installation is Complete?
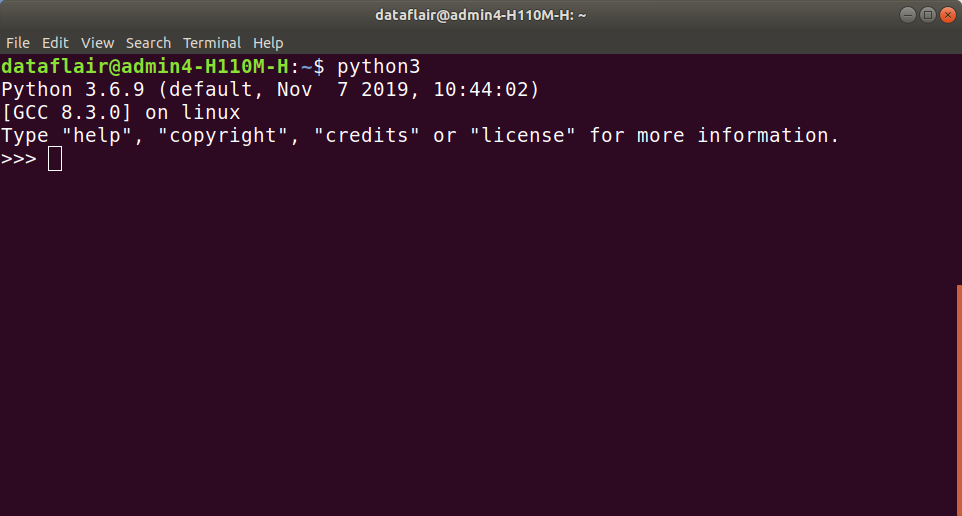
To check if everything is installed properly, follow the below steps:
- Open the terminal in your system.
- Start the Python shell by typing python3 and then hit enter. You will be inside the Python shell where you can execute your Python code.
- Import the cv2 package which is the name of the OpenCV module. Type “import cv2” and hit enter.
If you don’t get any error after completing these steps, then you have successfully installed the Python and OpenCV library. Your terminal will look similar to the below image.
Summary
In this tutorial, we have successfully configured Python and installed the OpenCV library for Python using pip. The setup is easy and it takes only 5 minutes to complete. In the end, we saw how you can verify if everything is installed properly.
Clear all your basic concepts of OpenCV with OpenCV Python Tutorial
Did you face any difficulty to install OpenCV in your system? Share with us in the comment section. Our experts at DataFlair will be happy to help you.
You give me 15 seconds I promise you best tutorials
Please share your happy experience on Google


thank you for this I was searching from since 3 days that how to install opencv everyone was showing complex steps but it was too easy
We are immensely grateful for your incredibly kind words. We kindly request you to share our free courses with as many people as possible. Our mission is to provide free education to everyone (including the last person in the society) and by providing the free education, we will consider you an integral part of our mission.
thank you for this I was searching from since 3 days that how to install opencv everyone was showing complex steps but it was too easy