Android AlarmManager – Ever thought how it works in Android?
FREE Online Courses: Knowledge Awaits – Click for Free Access!
Before we begin with this article, let us recall setting up an alarm for the morning in our phones. That is exactly the Android AlarmManager in Android does.
Android AlarmManager gives us a number of advantages in different ways. It helps us schedule an alarm for a particular time in a particular time period. In this article, that is what we are going to do. We will implement an alarm in our application using AlarmManager.
Before we get started with it, let us quickly brush up the following, as we will be using them in our application-
After we are done with these topics, which are important for implementing Alarm Service in android application, we will understand about Android AlarmManager.
Introduction to Android AlarmManager
Android AlarmManager is a class that provides access to alarm services of the system. Through this, it lets us schedule the application to run at a particular time. As soon as the alarm goes off, the system broadcasts the intent registered for it. The wake lock of the CPU is held by the AlarmManager till the alarm receiver’s onReceive() method is in execution. This thing ensures that the device does not sleep until the broadcast is handled.
Alarms basically give us the way to perform time-based operations. Basically, an alarm has characteristics which are given below:
- They fire intents at particular time intervals or at a particular time.
- They have the ability to run outside the application as well, this enables the alarm to trigger the event even if the application is not running, or the device is asleep.
- They can be used along with the broadcast receivers, to perform a particular action or to start services.
- They help in minimizing the resource requirements.
- They will execute until and unless they are force stopped or the device restarts.
“An alarm pushes you to perform your preplanned task on regular intervals ”
To set an Alarm we first need to create its object, then pass it to the pending intents as follows:
AlarmManager am = (AlarmManager) getSystemService( Context.ALARM_SERVICE);
Intent ai = new Intent(context, alarmreceiver.class);
PendingIntent pi = PendingIntent.getBroadcast(context, 0 , ai, 0);
Int interval = 8000;
manager. setInexactRepeating( AlarmManager/RTC_WAKEUP, System.currentTimeMillis(), interval, pendingIntent);
Ways to invoke Alarm Manager in Android
1. setInExactAndRepeating: This type of AlarmManager does not trigger the alarm at the exact time.
2. setExact: This type of AlarmManager ensures that the system triggers the alarm at an exact time.
3. setExactAndAllowWhileIdle: This type of AlarmManager is allowed to be executed, even in low power modes of devices.
We will move on to implement it in our application without any delay.
Implementation of Android AlarmManager
Now, we will see how we can implement a simple Android AlarmManager to set alarm in our application. For that we will follow the following steps:
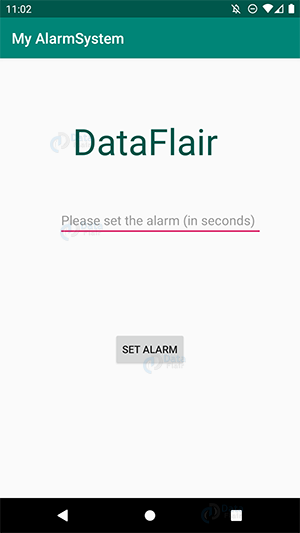
1. First of all, we will create a new application and name it according to our choice. I have named it as My AlarmSystem.
2. Now we will open the activity_main.xml file and define the layout of our application.
<?xml version="1.0" encoding="utf-8"?>
<RelativeLayout xmlns:android="http://schemas.android.com/apk/res/android"

   xmlns:tools="http://schemas.android.com/tools"
   android:layout_width="match_parent"
   android:layout_height="match_parent"
   tools:context="com.DataFlair.myalarmsystem.MainActivity">

   <TextView
       android:id="@+id/textView"
       android:layout_width="wrap_content"
       android:layout_height="wrap_content"
       android:layout_centerHorizontal="true"
       android:layout_marginLeft="90dp"
       android:layout_marginTop="80dp"
       android:text="DataFlair "
       android:textColor="#00574B"
       android:textSize="50dp" />

   <Button
       android:id="@+id/button"
       android:layout_width="wrap_content"
       android:layout_height="wrap_content"
       android:layout_alignParentBottom="true"
       android:layout_centerHorizontal="true"
       android:layout_marginBottom="180dp"
       android:text="Set Alarm" />

   <EditText
       android:id="@+id/time"
       android:layout_width="280dp"
       android:layout_height="wrap_content"
       android:layout_alignParentTop="true"
       android:layout_marginLeft="80dp"
       android:hint="Please set the alarm (in seconds)"
       android:layout_marginTop="200dp"
       android:ems="10" />
</RelativeLayout>
3. Now we will open the MainActivity.java file and write the following code:
package com.DataFlair.myalarmsystem;
import android.app.AlarmManager;
import android.app.PendingIntent;
import android.content.Intent;
import android.os.Bundle;
import android.view.View;
import android.widget.Button;
import android.widget.EditText;
import android.widget.Toast;
import androidx.appcompat.app.AppCompatActivity;
public class MainActivity extends AppCompatActivity {
Button start;
@Override
protected void onCreate(Bundle savedInstanceState) {
super.onCreate(savedInstanceState);
setContentView(R.layout.activity_main);
start = findViewById(R.id.button);
start.setOnClickListener(new View.OnClickListener() {
@Override
public void onClick(View view) {
startAlert();
}
});
}
public void startAlert() {
EditText txt = findViewById(R.id.time);
int x = Integer.parseInt(txt.getText().toString());
Intent my_intent = new Intent(this, MyBroadcast.class);
PendingIntent pendingIntent = PendingIntent.getBroadcast(
this.getApplicationContext(), 2343, my_intent, 0);
AlarmManager alarmManager = (AlarmManager) getSystemService(ALARM_SERVICE);
alarmManager.set(AlarmManager.RTC_WAKEUP, System.currentTimeMillis()
+ (x * 1000), pendingIntent);
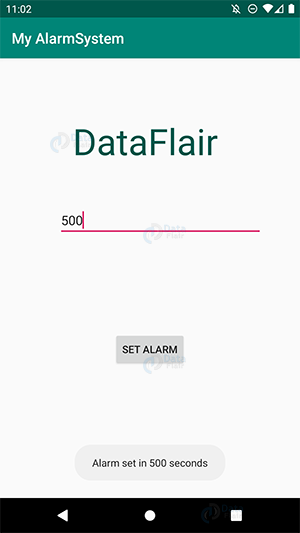
Toast.makeText(this, "Alarm set in " + x + " seconds", Toast.LENGTH_LONG).show();
}
}4. Now we will create a file, MyBroadcast.java. For that, we will write the following code:
package com.DataFlair.myalarmsystem;

import android.content.BroadcastReceiver;
import android.content.Context;
import android.content.Intent;
import android.media.MediaPlayer;
import android.widget.Toast;

class MyBroadcast extends BroadcastReceiver {
   MediaPlayer mediaPlayer;

   @Override
   public void onReceive(Context context, Intent intent) {
       mediaPlayer = MediaPlayer.create(context, R.raw.alarm);
       mediaPlayer.start();
       Toast.makeText(context, " Alarm Ringing..", Toast.LENGTH_LONG).show();
   }
}
5. After that, we will open the Manifest.xml file, and write the following code:
<?xml version="1.0" encoding="utf-8"?>
<manifest xmlns:android="http://schemas.android.com/apk/res/android"
package="com.DataFlair.myalarmsystem">

   <application
       android:allowBackup="true"
       android:icon="@mipmap/ic_launcher"
       android:label="@string/app_name"
       android:roundIcon="@mipmap/ic_launcher_round"
       android:supportsRtl="true"
       android:theme="@style/AppTheme">
       <activity android:name=".MainActivity">
           <intent-filter>
               <action android:name="android.intent.action.MAIN" />

               <category android:name="android.intent.category.LAUNCHER" />
           </intent-filter>
       </activity>
       <receiver android:name="MyBroadcast"></receiver>
       <meta-data
           android:name="preloaded_fonts"
           android:resource="@array/preloaded_fonts" />
   </application>
</manifest>
6. Now if you run the above code, it would say “cannot find symbol variable raw”. For that, a very important step is to create a file raw in the res folder. In that, you need to copy a ringtone and name it as ‘alarm’ as we have used ‘R.raw.alarm’. Here alarm is the name of ringtone that I have added.
7. After that, we will run our application.
i) First, enter the seconds for which you want to set the alarm.
ii) After entering seconds, click on set alarm.
Summary
In this article, we have read about the Android AlarmManager. We learned what it is and also we implemented it in our simple android application. Now it is your turn to do the same. Do let me know and thank you.
So this was the article about Android AlarmManager. If you liked it, do rate us on google for more interesting blogs.
Keep Learning 😀
Your opinion matters
Please write your valuable feedback about DataFlair on Google


How to dismiss if alarm start running?
I’m happy I have found a tutorial that tells you to create an app, rather than “press ctrl+p” or some other key combination. I would have liked more if you explained your code, eg. in the line PendingIntent pendingIntent = PendingIntent.getBroadcast(this.getApplicationContext(), 2343, my_intent, 0); why 2343?