Android Activity Lifecycle with Callback Methods & Usage
FREE Online Courses: Dive into Knowledge for Free. Learn More!
Android Activity provides users with a frame to interact with & perform their actions. Since an activity interacts with the user, it designs a window to hold UI elements. An interactive application has many activities providing a screen & interacting with each other.
Come let’s see what we’re going to study about Android Activity in this tutorial:
- What is Activity
- Android Activity Lifecycle
- Android Activity Lifecycle Methods
- Manifest Attributes of Android Activities
What is Activity?
We know by now, that an activity is a single screen of an application that lets us see and interact to perform an activity. Usually, an application contains many screens and each screen extends Activity() class.
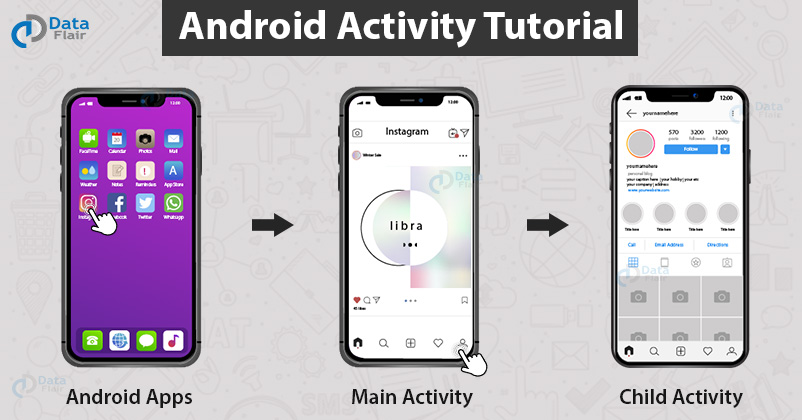
When we work on an application what we see is a UI on the screen which is an activity. Most of the applications that we use have many activities. Among all those activities, one is the MainActivity() & the rest are its ChildActivities(). Generally, the first page that appears on the screen when an application opens is referred to as MainActivity(). This main activity interacts with the child activities and lets the user access them.
Activities are stored in a stack of Activities, wherein the current activity holds the highest position.
Before proceeding, let’s revise the Android Application Components
Android Activity Lifecycle
An activity can have four states, which are :
- Running
- Paused
- Resumed
- Stopped
The above are the four states that Android activity can achieve during its whole lifecycle.
1. Running State
An activity is in the running state if it’s shown in the foreground of the users’ screen. Activity is in the running state when the user is interacting with it.
2. Paused State
When an activity is not in the focus but is still alive for the user, it’s in a paused state. The activity comes in this state when some other activity comes in with a higher position in the window.
3. Resumed State
It is when an activity goes from the paused state to the foreground that is an active state.
4. Stopped State
When an activity is no longer in the activity stack and not visible to the users.
Android Activity Methods
Android activities go through four states during their entire lifecycle. These activities have callback methods() to describe each activity in each of the four stages. These methods need to be overridden by the implementing subclass. In Android, we have the following 7 callback methods that activity uses to go through the four states:
- onCreate()
- onStart()
- onPause()
- onRestart()
- onResume()
- onStop()
- onDestroy()
We’ll understand these in the following:
1. onCreate()
The Android oncreate() method is called at the very start when an activity is created. An activity is created as soon as an application is opened. This method is used in order to create an Activity.
Syntax:
@Override protected void onCreate(Bundle savedInstanceState)
{
super.onCreate(savedInstanceState);
...
}
2. onStart()
The Android onstart() method is invoked as soon as the activity becomes visible to the users. This method is to start an activity. The activity comes on the forescreen of the users when this method is invoked.
Syntax:
@Override protected void onStart()
{
super.onStart();
...
}
3. onPause()
The Android onPause() method is invoked when the activity doesn’t receive any user input and goes on hold. In the pause state, the activity is partially visible to the user. This is done when the user presses the back or home buttons. Once an activity is in the pause state, it can be followed by either onResume() or onStopped() callback method.
Syntax:
@Override protected void onPause()
{
super.onPause();
...
}
4. onRestart()
The Android onRestart() method is invoked when activity is about to start from the stop state. This method is to restart an activity that had been active some time back. When an activity restarts, it starts working from where it was paused.
Syntax:
@Override protected void onRestart()
{
super.onRestart();
...
}
5. onResume()
The Android onResume() method is invoked when the user starts interacting with the user. This callback method is followed by onPause(). Most of the functionalities of an application are implemented using onResume().
Syntax:
@Override protected void onResume()
{
super.onResume();
...
}
6. onStop()
The Android onStop() method is invoked when the activity is no longer visible to the user. The reason for this state is either activity is getting destroyed or another existing activity comes back to resume state.
Syntax:
@Override protected void onStop()
{
super.onStop();
...
}
7. onDestroy()
The Android onDestroy() is the method that is called when an activity finishes and the user stops using it. It is the final callback method received by activity, as after this it is destroyed.
Syntax:
@Override protected void onDestroy()
{
super.onDestroy();
...
}
Understand the flow of Activity through the four states using the seven methods from the diagram:

Manifest Attributes of Android Activity
To implement activities in our application, we need to register them in the Manifest file. For the activities to work properly, we must manage their lifecycle properly. Now let us see the declaration of activities and their attributes in Manifest files. We’ll see the syntax as well, using datflair_activity as an example.
1. Declare Activities
For this, the required attribute name is android:name.
To declare it in the manifest file, simply open the Manifest and type add <activity> tag under <application> tag.
The syntax to declare Android activity:
<manifest ... >
  <application ... >
      <activity android:name=".Dataflair_activity" />
        ...content….
  </application ... >
</manifest >
To declare an activity, we only need one important element that is the name of the activity. We can add certain attributes like UI, label, etc.
2. Declare Intent filters
Intents are a very crucial part of an Android application. Intents let an activity to be launched in other activity or applications. It also provides the advantage of making an implicit or an explicit request.
The syntax is as follows:
<activity android:name=".Dataflair_Activity" android:icon="@drawable/app_icon">
    <intent-filter>
        <action android:name="android.intent.action.SEND" />
        <category android:name="android.intent.category.DEFAULT" />
        <data android:mimeType="text/plain" />
    </intent-filter>
</activity>
3. Declare Permissions
Android activity tag can also control which applications can start activities. For permission, the element that is used is android:permission. With this, we can put control on the activities, where they can be launched.
The syntax is as follows:
<manifest>
<activity
android:name=".dataflair_activity"
android:permission=”com.google.socialapp.permission.SHARE_POST”
/>
<manifest/>
Summary
Now that we’ve discussed so much about Android Activity, I hope you’re now clear with what an Activity is. We also know now, how important it is for an application to manage it properly.
Check the Best Android Books for getting started with Android Development
Your 15 seconds will encourage us to work even harder
Please share your happy experience on Google


Can you create a button at the end of the page so that it can redirect to the next page continuously without going to the top