Android UI Testing – Explore the Top 5 Testing Tools in Android!
FREE Online Courses: Your Passport to Excellence - Start Now
Android Applications that we make consist of two main things that are the front end and the back end. We want our users to be happy and satisfied with the working of these Applications. Also, we need to make sure that the users of the applications do not face any problem. We can do this through Testing. In this article, we will learn about the concept of Android UI Testing, methods of testing applications and will further explore the tools of Android UI Testing.
Do you know how to create an Android Application?
Android UI Testing
UI Testing of an Android application is a very important part of Software development. But, it is mostly overlooked by developers. It’s indeed vital to make sure that no part of our Application malfunctions. By Testing, we verify the functions, behaviors, correctness, and usefulness of our applications. It also has the following advantages:
- Feedback about the errors generated
- Improved performances
- Stable development of application
- Failure detections on the beforehand
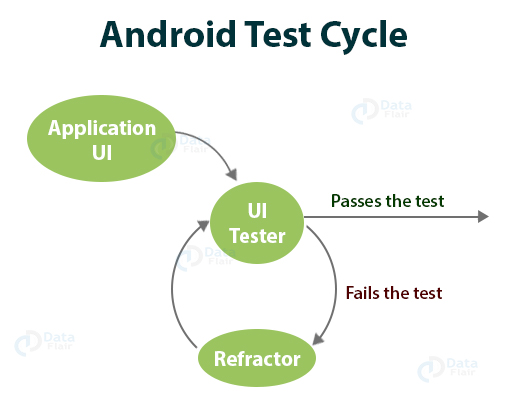
This process of testing takes place in the following cycle:
Methods of Android UI Testing
There are two ways for testing the application:
- Human tester approach.
- Automated Tester approach.
In the above-mentioned ways, the Human Tester approach is good, but not completely reliable. There’s no surety that our application would function properly after Manual Testing. A Human tester can often lead to a casual or lack of attention towards testing. It might also happen that the Tester simply skips some steps to finish the work fast.
In order to save us from this tough situation, Automation came into the role. Did you ask, How? Well, Automated Tools! Automated Testing tools ensure that our app meets all the functional requirements and improves its quality ensuring that more and more users like it.
Moving forward, we will see some of the top Android UI Testers. Also, before that, we’ll discuss how we should select Android UI Testers for our applications.
How to Select Android UI Testers
Consider the following before selecting a tool for UI testing:
1. Estimated time to learn the tool
You should be well aware of the time taken to learn the tool. This is important, as you need to have sufficient time to learn.
2. Requirements of the tool
You need to make sure that all the required tools and requirements for the tool are fulfilled by you. This would save your time beforehand, as you can check for the tools requirement beforehand.
3. Cost Factor
You should check the maintenance cost, license fees, and other required cost factors. This is important, so later you don’t face any problem with it.
4. Timely releases and updates
You should make sure that the tool that you’re going to use gets regular updates and fixes the bugs regularly.
5. Integration quotient
Coming to the last point, make sure that the tools can easily integrate with other tools. The tools should be ready for customization.
And not to forget, checking a user review is always a better idea. 🙂
Now we’ll move towards the best tools for Testing our Android UI…
Types of Android UI Testing Tools
Android UI testing tools can be of two types that are:
- Native
- Cross-platform
The above mentioned are the two types of testing tools that are available to us.
Native UI testing tool
These tools are available for the Native Applications. Native applications are those that target the platform. These applications won’t work on some other platform. They are developed in a specific Operating System.
If an application is built for Android it’ll work only in Android. Since it is made for a targeted platform, it makes sure that the application takes full advantage of the features of the device. Native UI testing targets only one Platform and utilizes it completely.
Cross-platform UI tool
These tools are for Cross-Platform applications. Cross-platform applications, same as their name works on different platforms. These applications work on any platform and Operating System.
These are developed using intermediate languages such as JavaScript. These applications once written, can be shared across almost all the target platforms. This makes using applications across platforms hustle-free.
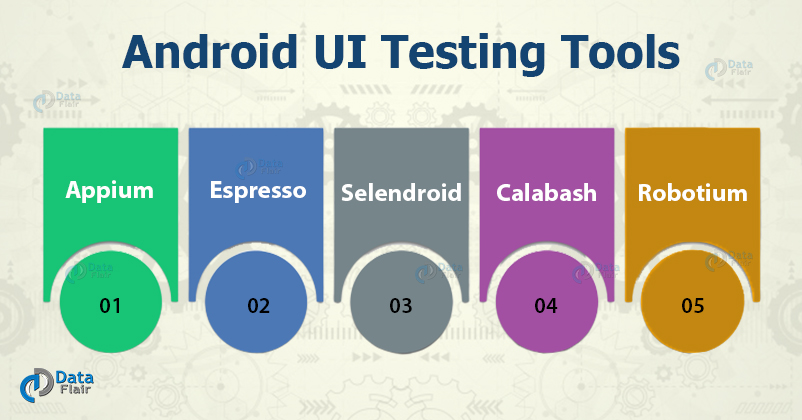
Top 5 Android UI Testing Tools
Now that we have seen the two types of UI testing tools, and also how to choose the right UI testing tool. We will move towards the top 5 Android UI testing tools.
1. Appium
Let us start with Appium. Appium is an open-source, freely available cross-platform automated testing tool. This tool can be used in ios and android both. It automates Android using the UIAutmator library provided by Android SDK.
This tool supports Android versions from Android 2.3 onwards. It supports languages that have Selenium client libraries such as Java, JavaScript, Python, c#, PHP, Ruby, etc. Appium extends WebDrivers with API methods making it suitable for mobile automation.
Some features are:
- Easy to set up on different platforms.
- No need of installing anything on the device.
- You can easily test your application on it, without making any changes.
- It comes with a tool to scan and analyze application UI components – Appium UI inspector.
- It suits you best if you’re in need to test both android and ios applications.
- Supports all web-driver compatible languages for test cases (Java, objective-C, JS)
- Easy integration with other tools using Java.
- Any testing framework can be used.
Time to take a deep insight into Android Application Components with DataFlair.
Cons of Appium are:
- Test cases are slow to execute.
- The minimum supported Android SDK is 16.
- Application code and Test code is stored separately.
- Different steps for different platforms.
2. Espresso
Espresso is another famous UI testing framework. It supports android applications from 2.3 onwards. It requires access to the source codes. Also, it has a White-box testing feature.
Some features of Espresso are:
- It can test Web-components.
- Fast and reliable testing.
- Built-in test Recorder.
- Active service and team.
- It does testing in such a way that the component is isolated. This makes other activities or components available to work on.
Cons of Espresso:
- It runs only one application at a time.
- Test cases can only be for Android.
- Test cases are only written in either Java or Kotlin.
- Deep understanding required.
3. Selendroid
Selendroid is a free, open-source leading Android Automated tool for Android UI Testing. It supports the plugging of hardware devices. It can easily interact with multiple Android devices at the same time. Also, it is highly compatible with the JSON wire protocol. For this, you can write the API test in Selenium 2.
Here are the key features of Selenium:
- It needs no modification of application in order to test it.
- It finds UI elements of the application using locators of different types.
- Selendroid supports gestures as well. Gestures are for making user interaction better.
- It has a Selenium Inspector to inspect the current state of the application’s UI.
- Selendroid can easily extend itself with your extensions, at the runtime.
- The existing Emulators starts automatically.
- Multiple Android device interactions simultaneously.
- It has built-in Inspector to simplify test case development.
Cons of Selendroid are:
- You need to have a good time in your hand to learn it
- It has no built-in image comparisons
4. Calabash
Calabash is also an open-source and free cross-platform UI testing tool. It can work efficiently with .NET, java, ruby, and other languages. It tests the native and hybrid applications.
Calabash can support testing & automation of applications on thousands of devices on cloud. Calabash supports the Cucumber framework.
Features of Calabash are:
- We use Calabash for Functional testing for local applications.
- It has two open library support- one for iOS and another for Another
- It’s APIs are specially for touch screen devices.
- It contrasts with Selenium Web Driver.
- It uses many languages like Java, Flex, .NET, Ruby, etc.
- It supports Cucumber Framework, which is easy to understand.
Cons of calabash are:
- It is still in a developing stage.
- If a step fails, it skips all the steps after this.
- Need complete code to identify the Id of elements.
- The emulator device takes time to load and run.
5. Robotium
Robotium is another open-source UI testing tool to test Applications of all versions. It supports all the versions after Android 1.6. Also, it is the first developed tool for Android automated UI testing. It does Black box testing and needs no additional information. Its preferred class for Test cases is Java. With Robotium, it is easy to write black-box test cases.
When it comes to preparing tests by robotium, one has to put in lots of effort and time. The person must work with the program source code to automate the things.
Features of Robotium:
- Test cases need minimal knowledge and less time.
- It handles many activities at the same time automatically.
- Easy to run test cases on pre-installed applications.
- It has a vast community and developers for continuously introducing new features.
Cons of Robotium:
- It can’t lock/unlock devices.
- No recording system.
- There is no screenshot facility.
Summary
Coming to end, let us recollect what all we have learned. Here in this article, we have discussed the concept of Android UI testers. We have seen why testing is important, how we should choose UI tester, what are the two types of UI testing Frameworks. And at last, we went through the top 5 UI testers for Android application with their pros and cons. That was all for this article, see you all in the next article.
Thank you for reading our article. Do share your feedback through the comment box below.
Did you know we work 24x7 to provide you best tutorials
Please encourage us - write a review on Google


